In this post we will show you how to create an empty Ubuntu Server on Digital Ocean using Terraform.
This post will be used a start for some other tutorials later, to start other services on DigitalOcean using Terraform.
Terraform is a tool that was created by Hashicorp to manage infrastructure via code.
In this post we will assume that following:
- You have an account on DigitalOcean
- You have filled in the payment info on your account, or charged your account using Paypal for example.
- You have pair of SSH keys on your machine.
- You are using Mac OS or Linux. Windows should work, but unfortunately I am not covering it here
- Install Terraform.
- Create an API Token for your account on DigitalOcean.
- Create a Terraform Project, and explain each piece of the Terraform Code.
- Create the Instance.
- Delete the Instance.
Install Terraform
Terraform can be installed in a different ways, based on the Operating System. You can always download the most up-to-date binary from the official download page.
On Mac OS you can use Homebrew
brew install terraform
On Linux you can use
wget https://releases.hashicorp.com/terraform/0.13.4/terraform_0.13.4_linux_amd64.zip
unzip terraform_0.13.4_linux_amd64.zip
sudo cp terraform /usr/local/bin
rm terraform_0.13.4_linux_amd64.zip
Just make sure you replace 0.13.4 with the most up-to-date version.
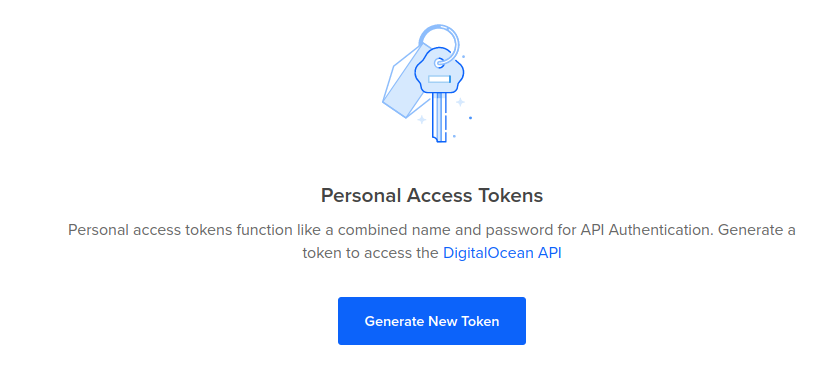
Create an API Token for your account on DigitalOcean.
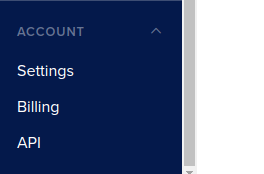
From your Digitalocean Dashboard, where you land after login, go to Settings
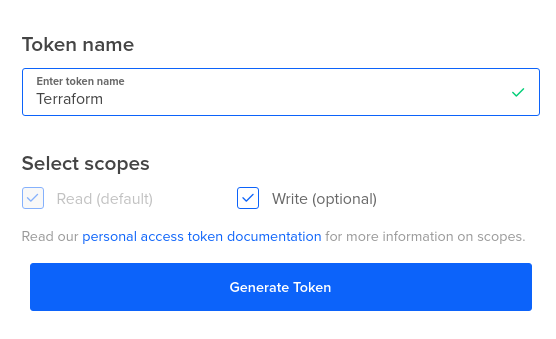
Press on Generate New Token
Enter a name for your Token, and give it both Read and Write permissions
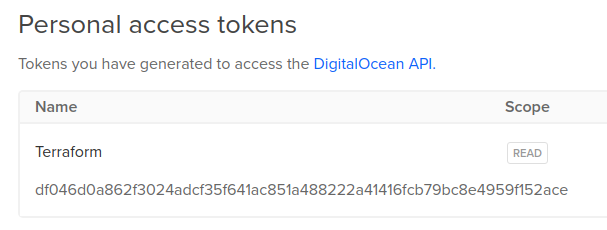
Copy the Generated Token, so that you can you use it for your Terraform Code.
You cannot view it again later, but you can regenerate it anytime you want.
Defining our target infrastructure using Terraform
mkdir instance-using-terraform
cd instance-using-terraform
Inside this new folder create a file named terraform.tfvars with the following content
              terraform.tfvars

do_token = "YOUR_DIGITAL_OCEAN_API_TOKEN" # Example do_token = "fgdfgh9df9h8gdf9h80dsg087062402346023482640283402432420"
ssh_key_path = "THE_PATH_TO_YOUR_PUBLIC_SSH_KEY" # Example : "/home/omar/.ssh/id_rsa.pub"
Then create a file, where we are going to add the description for our resources.
Call this file terraform.tf
Start with the following content:
              terraform.tf

variable "do_token" {}
variable "ssh_key_path" {}

terraform {
  required_providers {
    digitalocean = {
      source = "terraform-providers/digitalocean"
    }
  }
  required_version = ">= 0.13"
}

# Configure the DigitalOcean Provider
provider "digitalocean" {
  token = var.do_token
}
This code defines the required version of Terraform, and the Terraform DigitalOcean Provider that is needed to translate our resources to API calls, to Digital Ocean, to create, modify and later delete the instances
Then in the provider "digitalocean" we will pass the DigitalOcean API Token
to the provider, so that it can be used for all the calls.
The next thing we will do, is to define our first resources, which is your public SSH Key, that is going to be added to your Digital Ocean account. It is going to be added later to your first instance, when it's created. So that you can access it via SSH
Create another file called ssh_keys.tf
              ssh_keys.tf

resource "digitalocean_ssh_key" "my-ssh-key" {
  name       = "My SSH Key"
  public_key = file(var.ssh_key_path)
}
Then the final part, create a file called instances.tf
with the following terraform code
              instances.tf

resource "digitalocean_droplet" "my-server" {
  image  = "ubuntu-20-04-x64"
  name   = "my-server"
  region = "fra1"
  size   = "1gb"

  private_networking = true
  monitoring         = true

  ssh_keys = [digitalocean_ssh_key.my-ssh-key.fingerprint]
}

output "blank_ip" {
  value = digitalocean_droplet.my-server.ipv4_address
}
Create our first instance
Now that we are done with our Terraform Code, let's create our instance.
When you create a terraform code from scratch, and in some other cases that we will see in
more future tutorials, you will need to start with the command terraform init
You know you can proceed when you see this in the output
$ terraform init

Terraform has been successfully initialized!

You may now begin working with Terraform. Try running "terraform plan" to see
any changes that are required for your infrastructure. All Terraform commands
should now work.
With this, we are ready ready to create our resources. The next step is run
our first terraform apply command
$ terraform apply
.
.
.
.
Plan: 2 to add, 0 to change, 0 to destroy.

Do you want to perform these actions?
  Terraform will perform the actions described above.
  Only 'yes' will be accepted to approve.

  Enter a value:
When you run the apply command, you will see the generated plan for your
terraform provider. The plan will give you an idea about what terraform is going to add, modify or
delete on your resources. For this first time, you will see that it is going to add
two resources. The Public SSH Key, and the Instance (droplet)
Enter yes and press the Enter key to proceed.
digitalocean_ssh_key.my-ssh-key: Creating...
digitalocean_ssh_key.my-ssh-key: Creation complete after 1s [id=28766554]
digitalocean_droplet.my-server: Creating...
digitalocean_droplet.my-server: Still creating... [10s elapsed]
digitalocean_droplet.my-server: Still creating... [20s elapsed]
digitalocean_droplet.my-server: Still creating... [30s elapsed]
digitalocean_droplet.my-server: Creation complete after 33s [id=212664466]

Apply complete! Resources: 2 added, 0 changed, 0 destroyed.

Outputs:

blank_ip = 46.101.187.126
If you see this, then congrats. You just created your first DigitalOcean server instance using Terraform.
Let's try to access this instance. As you see from the output, we told Terraform to print
the Public IP4 of the instance so that we can access it. You can
tell Terraform to output many other attributes as well, using the output
block.
Let's try to access the instance now
$ ssh ubuntu@46.101.187.126

Welcome to Ubuntu 20.04.1 LTS (GNU/Linux 5.4.0-45-generic x86_64)

The programs included with the Ubuntu system are free software;
the exact distribution terms for each program are described in the
individual files in /usr/share/doc/*/copyright.

Ubuntu comes with ABSOLUTELY NO WARRANTY, to the extent permitted by
applicable law.

root@my-server:~# exit
logout
Connection to 46.101.187.126 closed.
As you can see, you managed to have access to your instance via SSH.
Deleting your instance
The last step in this tutorial is to show you how delete your instance, also using Terraform.
After you ran the exit command on your instance, and came back to your host bash console.
Run the terraform destroy command.
$ terraform destroy
.
.
.
.
Plan: 0 to add, 0 to change, 2 to destroy.

Changes to Outputs:
  - blank_ip = "46.101.187.126" -> null

Do you really want to destroy all resources?
  Terraform will destroy all your managed infrastructure, as shown above.
  There is no undo. Only 'yes' will be accepted to confirm.

  Enter a value:
  Enter a value: yes

digitalocean_droplet.my-server: Destroying... [id=212664466]
digitalocean_droplet.my-server: Still destroying... [id=212664466, 10s elapsed]
digitalocean_droplet.my-server: Still destroying... [id=212664466, 20s elapsed]
digitalocean_droplet.my-server: Destruction complete after 22s
digitalocean_ssh_key.my-ssh-key: Destroying... [id=28766554]
digitalocean_ssh_key.my-ssh-key: Destruction complete after 0s

Destroy complete! Resources: 2 destroyed.